Physical Address
304 North Cardinal St.
Dorchester Center, MA 02124
Physical Address
304 North Cardinal St.
Dorchester Center, MA 02124

How to move layers in alight motion – A layer is a group of reusable components under similar conditions. Layers are important for any design workflow because they are used to work on individual parts of the image while not affecting other parts. They allow you to edit your image, add text, change colors, put two images on the same page, and much more without editing your original image.
People who are using the Alight Motion App for the first time to edit their videos will have to face a lot of problems. Alight Motion is a technical app that takes a little practice to get 100% professional in video editing. Layers make any video 100x more attractive, and you must add them to make it look professional.
But you do not need to take any tension at all. In today’s article, we will teach you how to move layers in light motion, along with some video editing. So, make sure you read the full article and get all the parts and a paragraph because, as we told you earlier, the app will be a little complicated for beginners, so you need to pay attention to learn and understand the app.
Layers are one of the most important aspects of Alight Motion. They allow you to organize your video projects to look clean and professional easily. When you’re first starting, it can be tempting to throw all of your video clips into one layer. However, this will make your project look cluttered and messy. Using layers, you can keep your project organized and easy to follow. To know How to move layers in alight motion, please read the full article.
To move layers and edit them further, you must first add layers. From how to add layers to how to edit layers, you will get to learn everything in today’s article. Just keep reading the full article. You might have yet to find this best and easiest tutorial anywhere else. Follow the following points carefully for “how to move layers in Alight Motion.”
There are 2 types of layers. Audio layer and video layer. How to add video/ text/ image layers in your project is explained above. If you want to add audio layers to your project, kindly read the following points. How to move layers in Alight Motion (Audio Layers)
How to move layers in alight motion – Grouping layers is a great way to keep your project organized. When you group layers, they become one layer. This means that you can move and extend them as one unit. To group layers, select the layers that you want to group and click the “Group” button at the bottom of the screen.
For ungrouping the grouped layers, you have to do the opposite. Ungrouping layers is very easy. To ungroup layers, select the layers that you want to ungroup and click the “Ungroup” button at the bottom of the screen. This is the simplest and easiest way to group and ungroup layers.
Been using Alight Motion Pro for a bit but still don’t know how to move layers in Alight Motion? Don’t worry! We have solutions to all your problems. Keep reading the article, and we will teach you the easiest way to know how to move layers in alight motion.
Layers form the backbone of any animation, and you must learn how to create and use them effectively. We share a few quick and easy steps for grouping layers in Alight Motion. Once you get the hang of creating and arranging layers, creating cool animation with the Alight Motion app will become easy and enjoyable.
By using layers in alight motion, you can greatly enhance your video editing experience; this will be very profitable for you. After the video is exported, your video will look very impressive. That’s why layers are so important, and you must add them. They are highly recommended.
We taught you how to group layers. But sometimes, we accidentally make some editing mistakes, and it is very important to correct them. It is as easy to ungroup layers as it is to add them. To ungroup layers, go through the following points carefully: How to move layers in alight motion:
In a project with at least two layers, tap on the layer you want to be the child layer, then tap the Layer Parent button. Select the layer you want to be the parent from the drop-down menu. If you have selected a layer on the timeline, it’ll be unavailable in the parenting menu because a layer cannot be parented to itself.
These changes still take effect regardless of whether the child overlaps with the parent or is at a distance. The parenting relationship is one-way: moving, rotating, or scaling the child will not influence the parent. Moreover, layer order on the timeline does not affect parent relationships. Read the full article to know how to move layers in Alight Motion.
Adding layers to your videos, especially those time-taking videos, boosts the whole presentation. Layers add a plus point and beauty to your videos. Layers are placed on one another without affecting the bottom layer when arranging the upper or middle layer and vice versa.
You may also call it a series that shows up individually and adds more positive effects to your videos. You can add images, written content, shapes, and more in different layers placed categorically to enrich the look of your edited video.
You can vary in color and shape selection. Click Move and Transform to adjust the layers. After the selection process is completed, you can see the colors you selected on the left side. Long press on the chosen colors to proceed forward. This way, you can add layers in alight motion. This is the easiest and simplest way for “How to add layers in Alight Motion.”
Keyframes are specific points in a video where you change an object’s properties, such as position, scale, rotation, and opacity. By setting keyframes at different points in a video, you can create smooth and seamless animations. For example, if you want to make a text element move from one side of the screen to the other, you would set two keyframes: one at the starting position and another at the ending position. Read the following points carefully to know how to move layers in Alight Motion.”
Open Alight Motion. Tap on the layer you want to reverse to open the “Layer Properties” panel. Locate the “Reverse” button at the top of the panel. Tap on the “Reverse” button. Your video will now play in reverse. Just three simple steps, and you can have your video playing in reverse. So whether you need to fix a how-to video or want to make a silly backward video, Alight Motion has you covered.
Within the menu of new options, there is a list of shapes you can choose from. Tap on any shape to select the perimeter for your cropping. A square or rectangle is the easiest to work with, though you may use other shapes like stars or triangles for fanciful edits. This was the solution to how to move layers in Alight Motion.”

This was all about How to move layers in Alight Motion. We hope you had a great time reading our complete tutorial of “How to move layers in Alight Motion.” At Apps Guru, we will add more news about the alight motion Online. If you have any doubts regarding this, please get in touch with us ASAP. We are here to help you. Stay connected to our website appsguru.online for further updates.
Once you’ve added your layers and changed their order, you may want to move them around in your timeline. To do this, click on the layer and drag it to the desired location. You can also use the “Trim” tool to move your layer precisely. This is the easiest solution to the question “how to move layers in Alight Motion.”
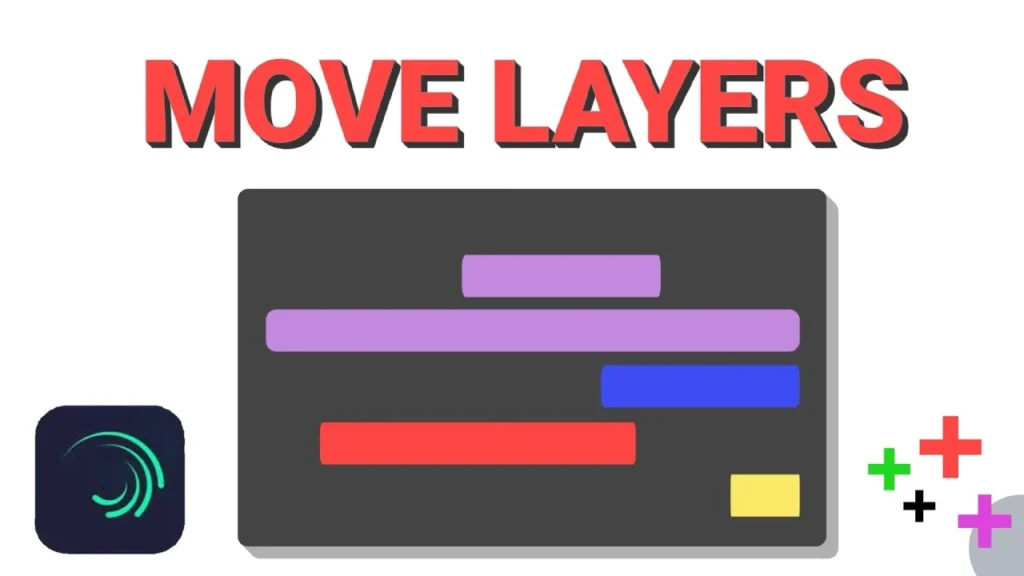
Go to the timeline- Go to the right end of the layers to move them. You can see a dashed line icon. Press and drag it. By pressing, the background of layers will become blue highlighted. Before moving, the layers are in this order: “Top-Middle-Bottom.” After moving, the new order is: “Middle-Top-Bottom.” You can change the order as needed. This was the solution for – How to move layers in Alight Motion.”
In a project with at least two layers, tap on the layer you want to be the child layer, then tap the Layer Parent button. Select the layer you want to be the parent from the drop-down menu. If you have selected a layer on the timeline, it’ll be unavailable in the parenting menu because a layer cannot be parented to itself. How to move layers in alight motion is very easy to understand.